Grecian Tank

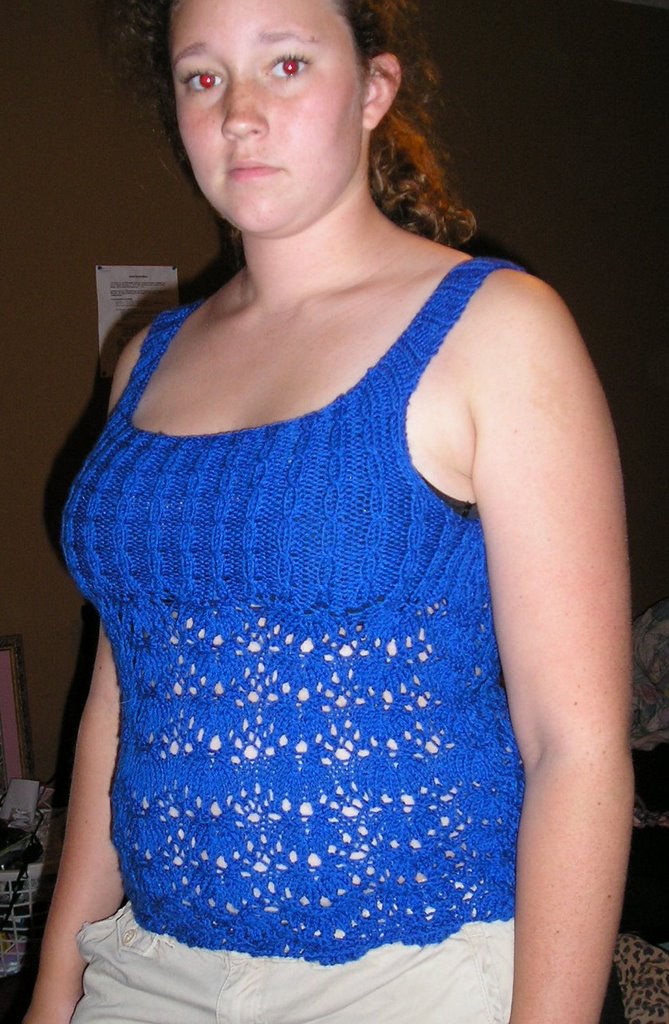

Grecian Tank
Supplies
1 hank Fleece Artist Kasula (100% kid mohair, dk weight) or dk weight hand painted wool yarn (something with plenty of natural elasticity) (I used about half of my hank of Kasula)
Alternative yarn: 3 skeins dk weight yarn such as Dream Baby or approximately 600-700 yards.
Overlay: 1 hank angel curls or complimentary kid mohair or other laceweight yarn(laceweight type) (you don’t need very much)
Needles: size 4.5 mm, size 5.0 mm, 6.0mm. and size 7.0mm (all European sizes/use American equivalents) Circulars 24” (or something about that….you will be using the circular sizes for the overlay, and if you prefer to just add stitches every 3 inches to allow for fit, then you don’t have to keep graduating up in size until midway when you need to switch to a larger needle for airiness in the fabric).
you will also need a separate needle to hold back stitches on.
Guage: on 2x2 rib, 3 inch square =12 stitches on 19 rows.
Sizes are for small/medium(34-35”); and medium/large (38-40”).
Special Stitch Patterns:
Half of a Porcupine Stitch: (12x +4)
Row 1: k2, (yo, k2tog) rep across row; end k2.
Row 2: K2, purl across row; end k2
Row 3: Knit
Row 4: K2, purl across row; end K2
Row 5: K2, (sl1/k2tog/psso, K4, yo, K1, yo, K4) repeat across row; end k2
Row 6: K2 (p3tog, p4, yo, p1, yo, p4) repeat across row; end k2.
Row 7: K2, (p3tog, p4, yo, p1, yo, p4) repeat across row; end K2
Row 8: K2 (sl1/k2tog/psso, K4, yo, K1, yo, K4) repeat across row; end k2
Rib pattern: (every row begins with 1 slipped stitch, purlwise with yarn in back)
Row 1, 3: k2, p2
Row 2, 4, 6: knit the knit stitches; purl the purl stitches
Row 5: following rib pattern, except for knit stitches, Knit through the back loop of 2nd knit stitch (do not slide off needle), then knit first knit stitch; slide both stitches off needle; purl the purl stitches
Back: Cast on 76 (88) Follow stitch pattern for 8 repeats. Switch to Rib pattern. Do one full repeat.
On next 2 rows, beginning on a Row 2, bind off 5 (6) keep to rib pattern for duration of rows.
On next 2 rows, (Row 4 and 5), bind off 3 (4) by slipping first stitch knitwise (rather than knitting it) and proceed with bo passing first slipped stitch over next stitch and continuing then for regular bo stitches. 60 (68) stitches.
Decrease one stitch each side on every right side row by slip1, k2tog on left side, end ssk. K1. until 50 (60) stitches remain on needle
Continue in Rib pattern until arm shaping is 4 inches (4 ½ inches). place all stitches on a separate needle; make front following same instructions as for back.
When both sides are knit to this point, you are ready to knit them together as follows:
First lightly steam the lace portion – NOT THE RIBBING – stretching lengthwise.
Beginning on Left Front edge, place marker; follow pattern across to Right Front edge, turn; cast on provisionally 27 (29), turn; attach back as follows: slip 27th (29th) stitch to left needle and knit together with first stitch of Right Back edge; follow rib pattern as established across to Left Back edge. Turn, provisionally cast on 27 (29), turn. Attach to front by slipping first stitch of right front onto left hand needle and knitting it together with the 27th (29th) cast on stitch to join round. Working now in the round, continue twisted rib pattern around entire sweater for 1 more complete row.
Row 3: Work to 4 (6) stitches past Right Back Shoulder (RBS). Turn, twisting yarn between two stitches (to twist yarn in: slip stitch from rt needle to left, bring yarn to front; slip stitch back to rt needle without knitting, catching yarn between stitches). Work 4 (6) + 26 (28) + 4 (6) stitches in rib pattern towards Right Front Shoulder (RFS). Turn; twist yarn in. Place marker. **Work back across to RBS marker, remove marker, work 2 more stitches, turn/twist yarn in. pm. Work back to RFS marker, remove marker, work 2 additional stitches, turn/twist yarn in, pm, ** 2x, removing markers on 2nd time. Work across right shoulder to Left Front Shoulder (LFS) marker, remove marker, work 4 (6) additional stitches; turn/twist yarn in, place marker. Work to Left Back Shoulder (LBS) + 4 (6) stitches; turn/twist yarn in, place marker. ** Work back to LFS marker, remove marker, work 2 additional stitches, turn/twist yarn in, pm; Work back to LBS to marker, remove marker, work 2 additional stitches; turn/twist yarn in, pm ** 2x. Work around to LFS, then work one complete row across all stitches following rib pattern.
(If not doing the overlay, then bo all stitches following in rib).
break yarn (leaving tail in for weaving in later).
Seam front and back at sides, INCLUDING seaming the first 5 bind off stitches of arm shaping (this creates a mock ease type element).
Overlay (optional):
Attach angel curls (or other laceweight type yarn) to last stitch and proceed with knit stitch only. Work so the knit side will face the WS of the body. Knit in the round for 1 inch; switch to 5.0 needles and continue for 3 inches. Switch to size 6.0 for 3 inches. Switch to size 7.0 for 3 more inches. (the knit side will be facing the inside of the sweater so that when you are done, the knit side will fold over and be seen on the outside).
Attach Kasula yarn and knit with the 7.0 for 1 row in a k2, p2 rib. Switch to size 5.0 needles and knit for 1 row following established rib. On third round, BO in rib.
Weave in all ends.
Tack overlay with hidden stitches onto shoulder shaping on both sides.
Straps: (optional)
With crochet hook and kasula doubled, attach yarn to just under top edge, 8 stitches in from armhole under the overlay. Chain 28 stitches. Attach to back 1 row under top edge on the body side, 6 stitches in from arm hole, with a slip stitch. Firmly weave yarns in catching the overlay so that it will not fall to reveal the chain connection. Do this on both sides.
If you cannot crochet, then do a 3 stitch I cord using only 1 strand of kasula and attach in the same places.
If you love my free patterns, you can encourage me to write more by leaving a note of thanks in the comments. I see them and it helps me to know that there is interest.
Email me if you have questions or have photos of your finished sweater.
Copyright. Please Do NOT duplicate without permission from the writer.
Jeanette Sherritze May 1, 2006
sherritzej@cox.net
http://knittinginsteadofhousework.blogspot.com/
posted by Jeanette @ 6:53 AM
![]()
![]()


4 Comments:
They are both so pretty! I don't think I currently have yarn in the stash to make either...Mohair and wool, in Florida? really? Here, I've been spending all this time trying to move into cotton blends.
Hello, Jeanette
I am a new subscriber...I stumbled upon you yesterday, and I took a look around. I think you have great taste, I love your style in both painting and handwork. I won't be making a tank THIS week, but I am sure I will enjoy one of your patterns at some point! Please keep at it, I am sure I speak for your silent readers! THANK YOU
Hi Jeanette,
Your designs are very feminine and flattering. I plan to make this tank, I have been looking for one all summer. You should submit some of your designs to Berroco,Inc., your patterns are as stylish and hip as theirs. Wow, keep on designing, you are a very talented person.
Diane in NC
hi Janette, it's Diane. I just looked at your paintings and i love them. I really like the ones that are bursting with color, but i really like the one with the red rose. That would be a nice HOUSE WARMING gift for our new house party this weekeend. ;) ;)! (ha ha a little hint.)
Love your bestest little sister
Dianee
Post a Comment
<< Home